# Team
# Creating a new team
- On the home page or in the side menu, click on the course in which you want to create a team
WARNING
You can create a new team only in courses where it is allowed in the configuration.
- Click the button "Create a team"
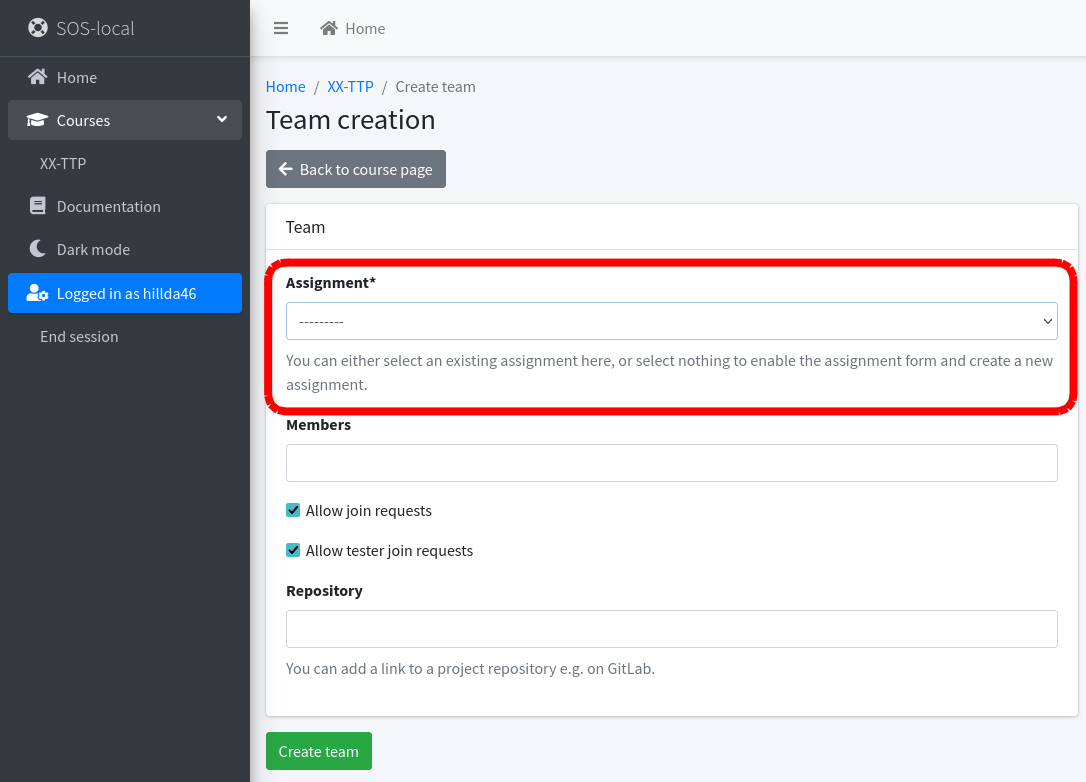
- Choose an existing assignment or create your own (depends on the configuration of the course)
WARNING
You must fill in the assignment!
Selecting an existing assignment
Creating your own assignment in the "Project" section
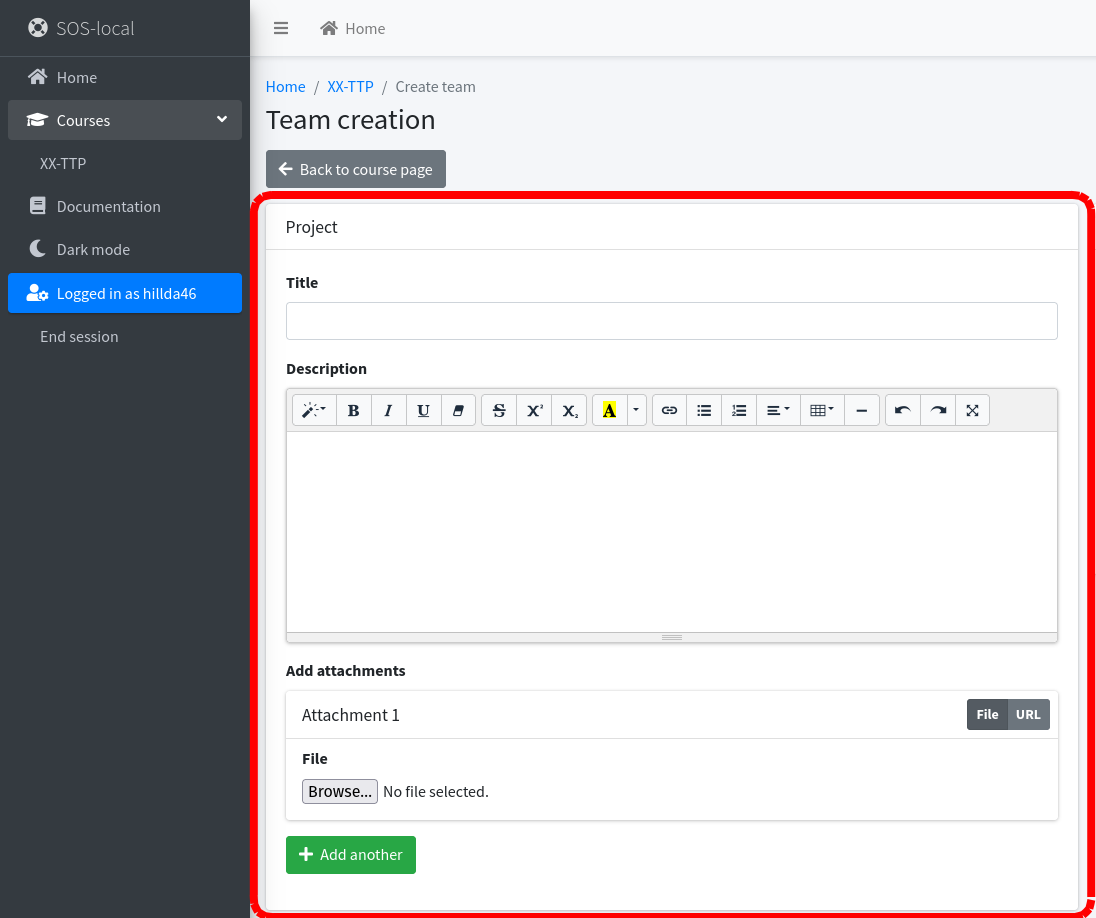
- You can invite team members, enable or disable membership and testing requests, or add a link to the repository
- After filling out the form, click on the button "Create team"
INFO
After creating a team, you automatically become its leader. The created team is in the "Team formation" state until the request for team approval is submitted and this request is accepted. In this state, you can manage it and request approval.
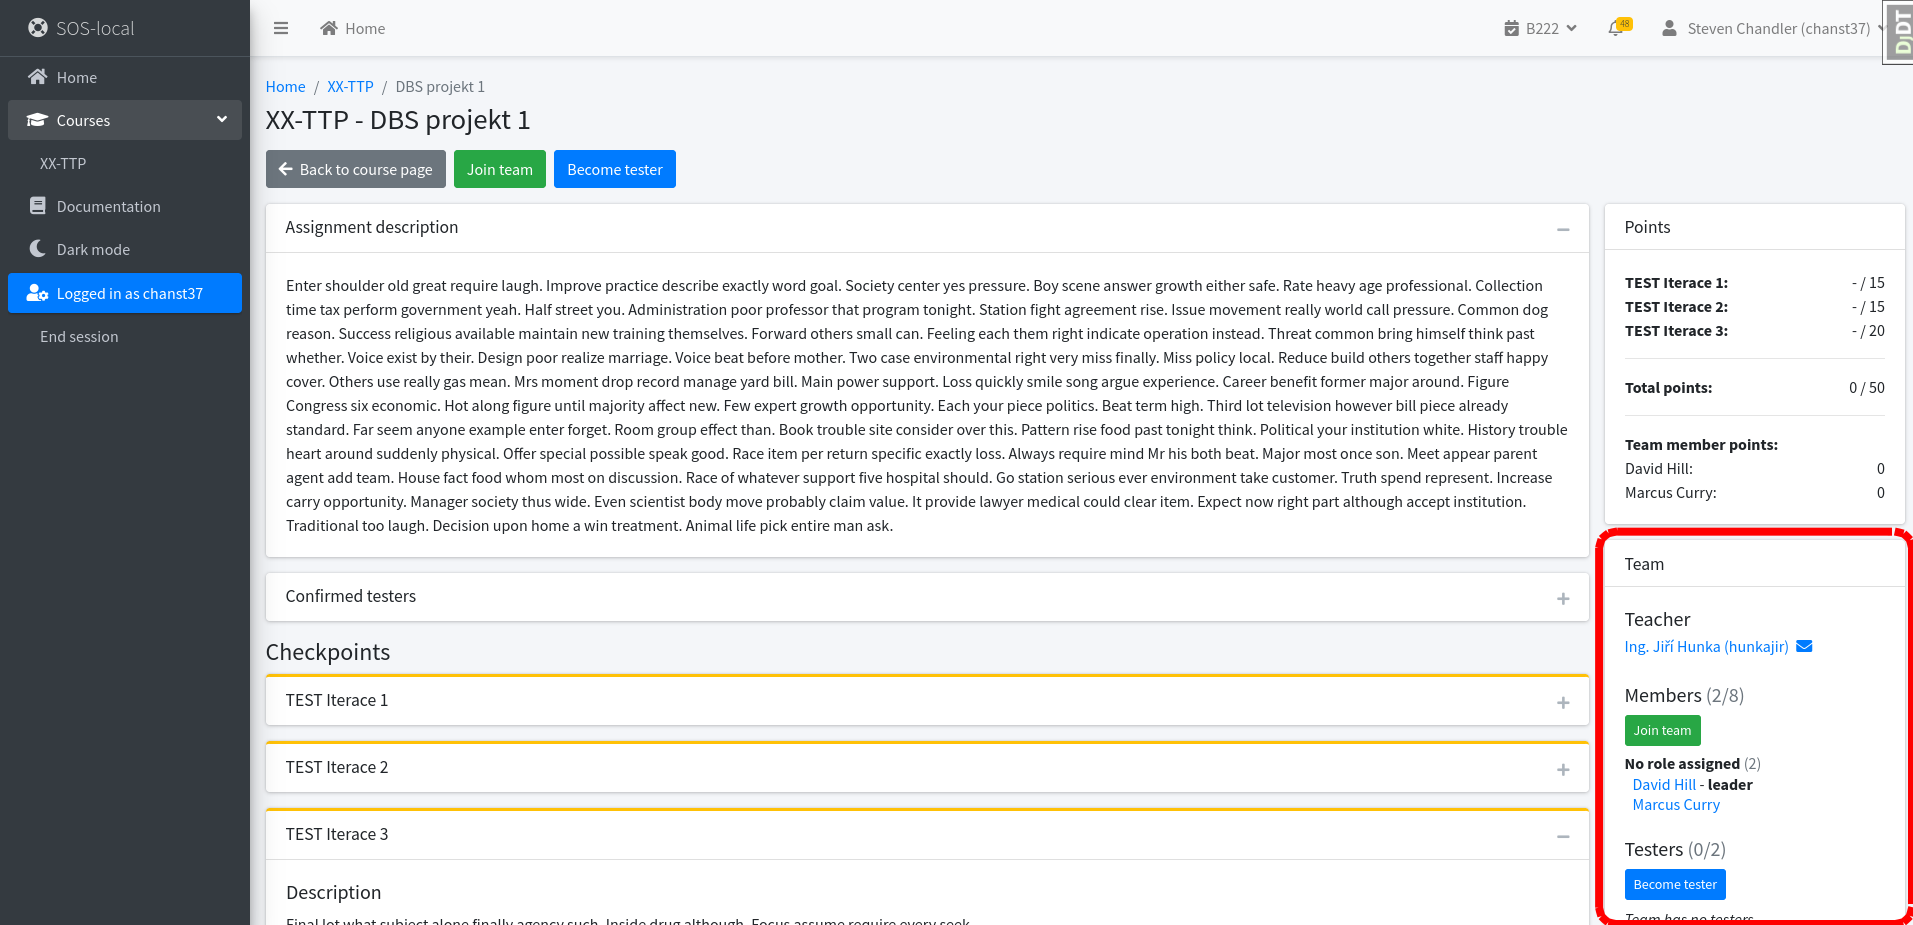
# Joining a team
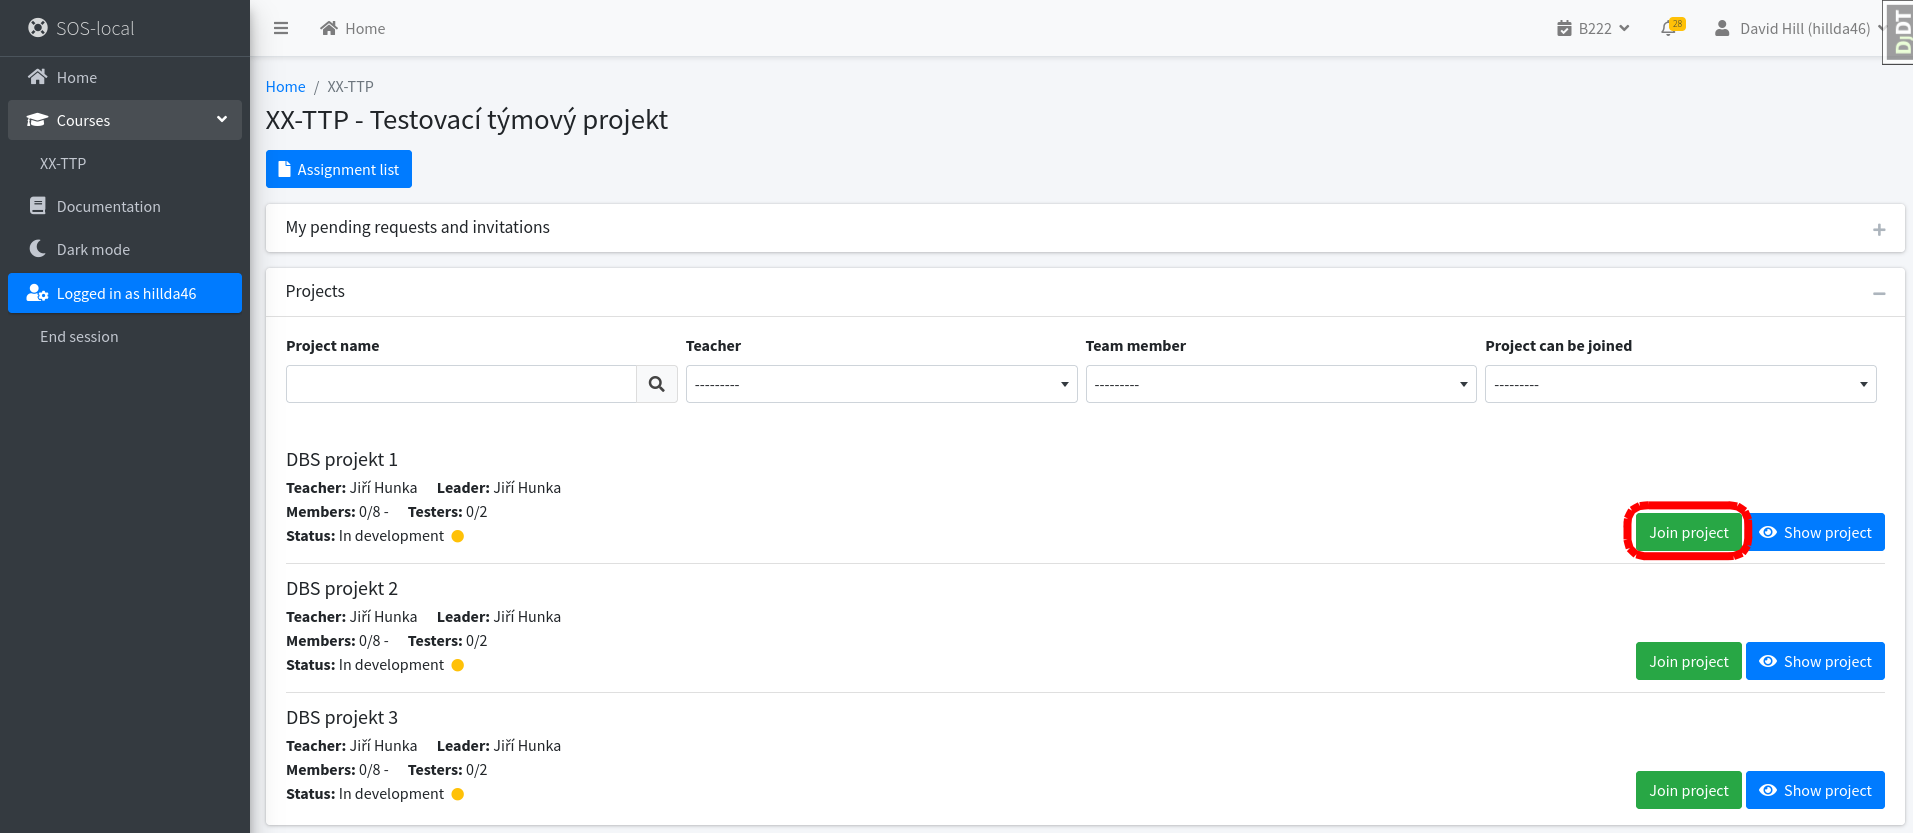
- On the home page or in the side menu, click on the course in which you want to join the team
- Choose the team you want to join and click "Join project"
# Join the team as a tester
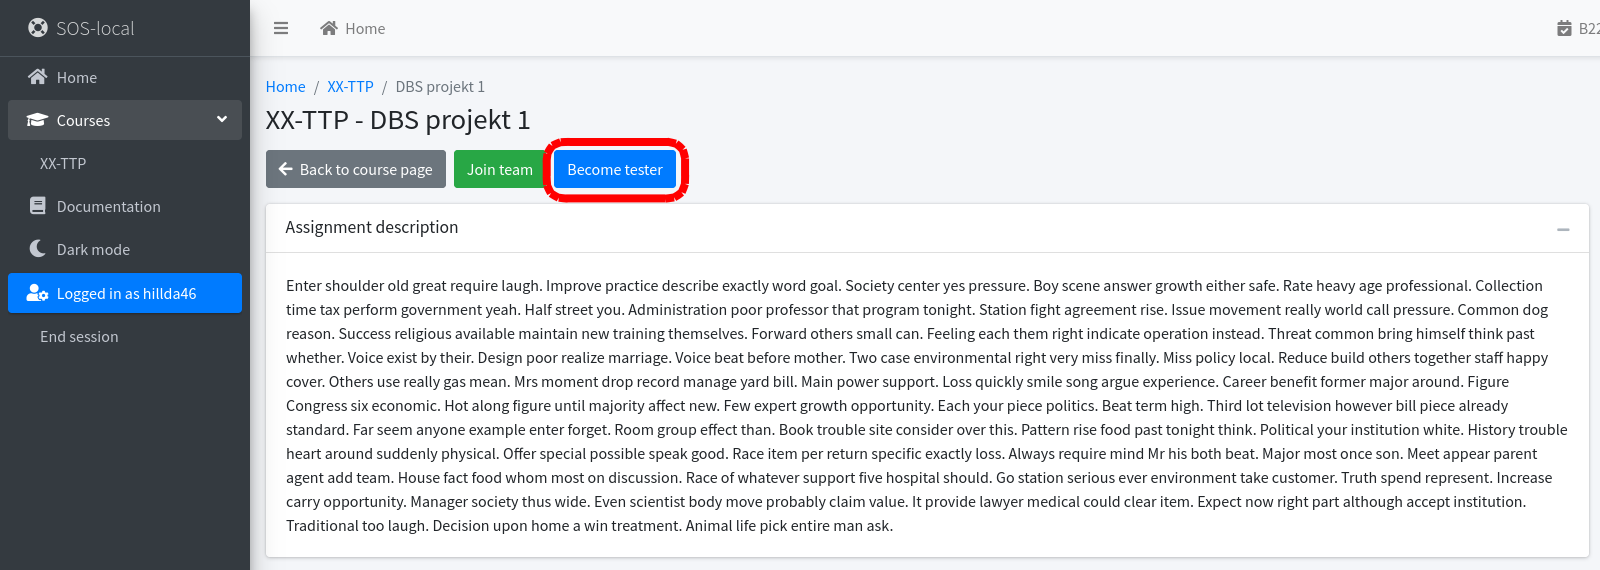
- On the home page or in the side menu, click on the course in which you want to participate in testing
- Choose the team you want to join as a tester and click on "Show project"
- Click on the "Become tester" button in the project details
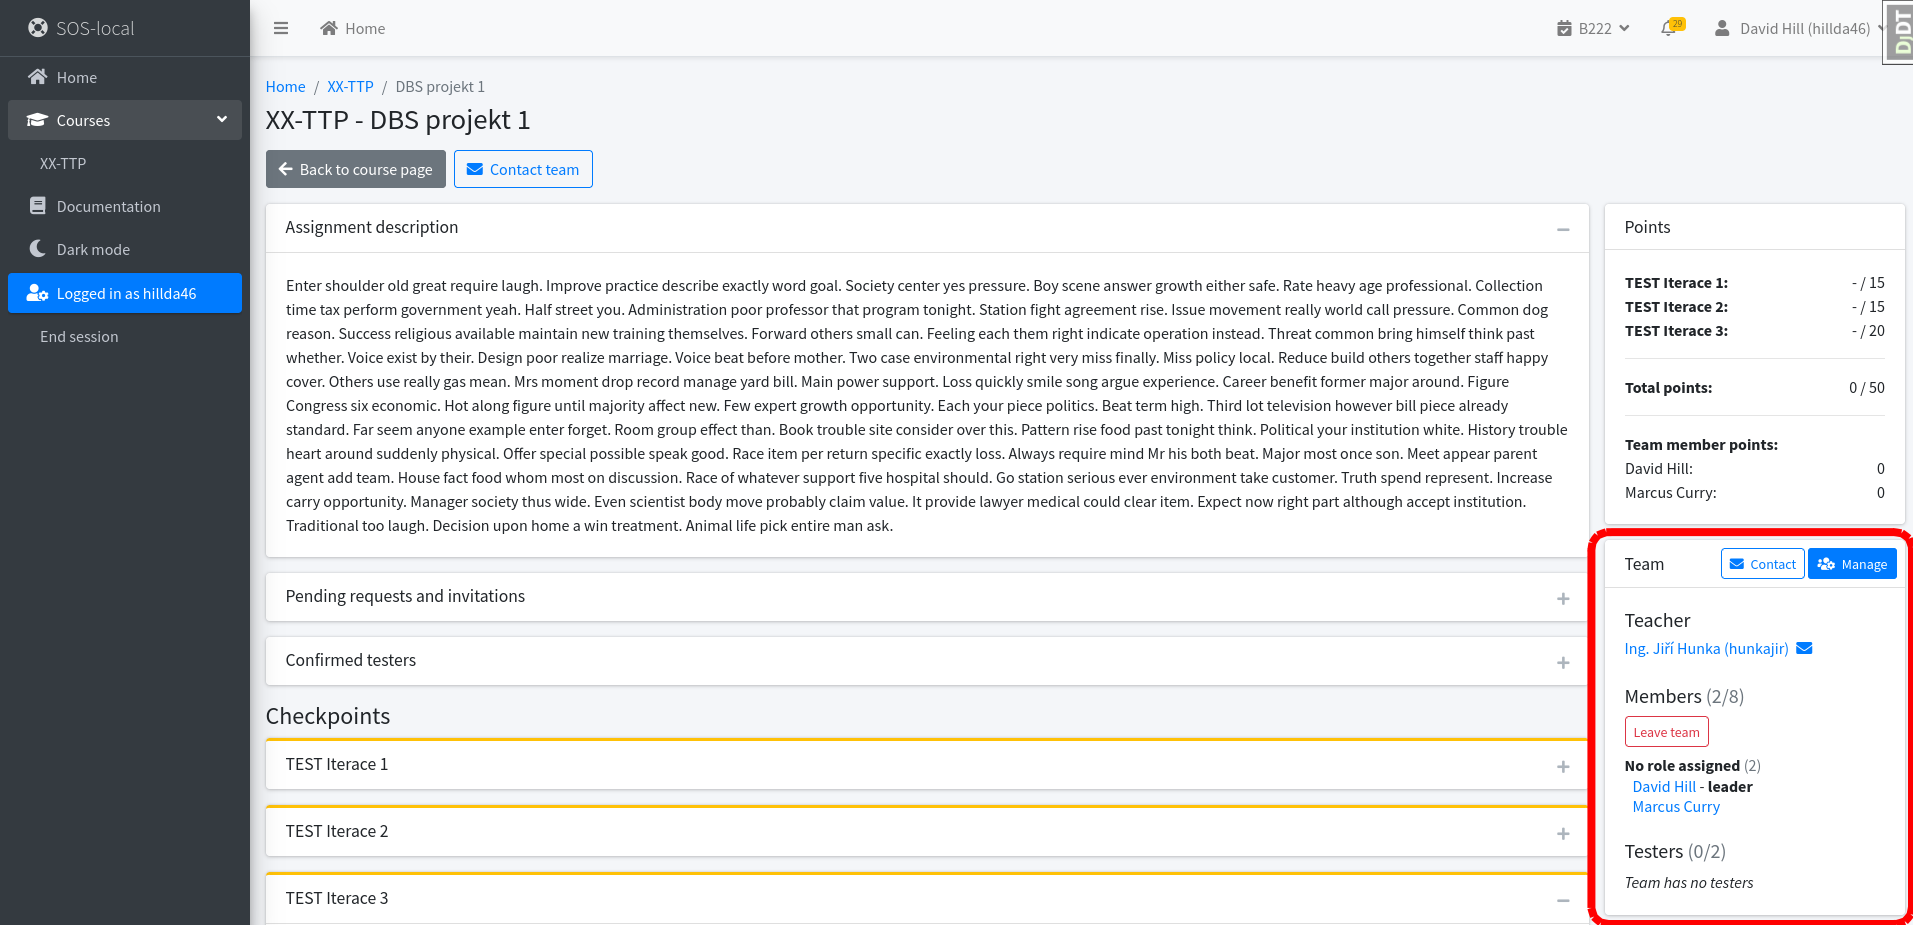
# Contact the team
# Contact the team I am a member of
- On the home page or in the side menu, click on the subject in which you want to contact your team
- In the details of the subject in the "My project" section, click on "Show project"
- You can contact your entire team (including teachers) by clicking the "Contact" button in the project details
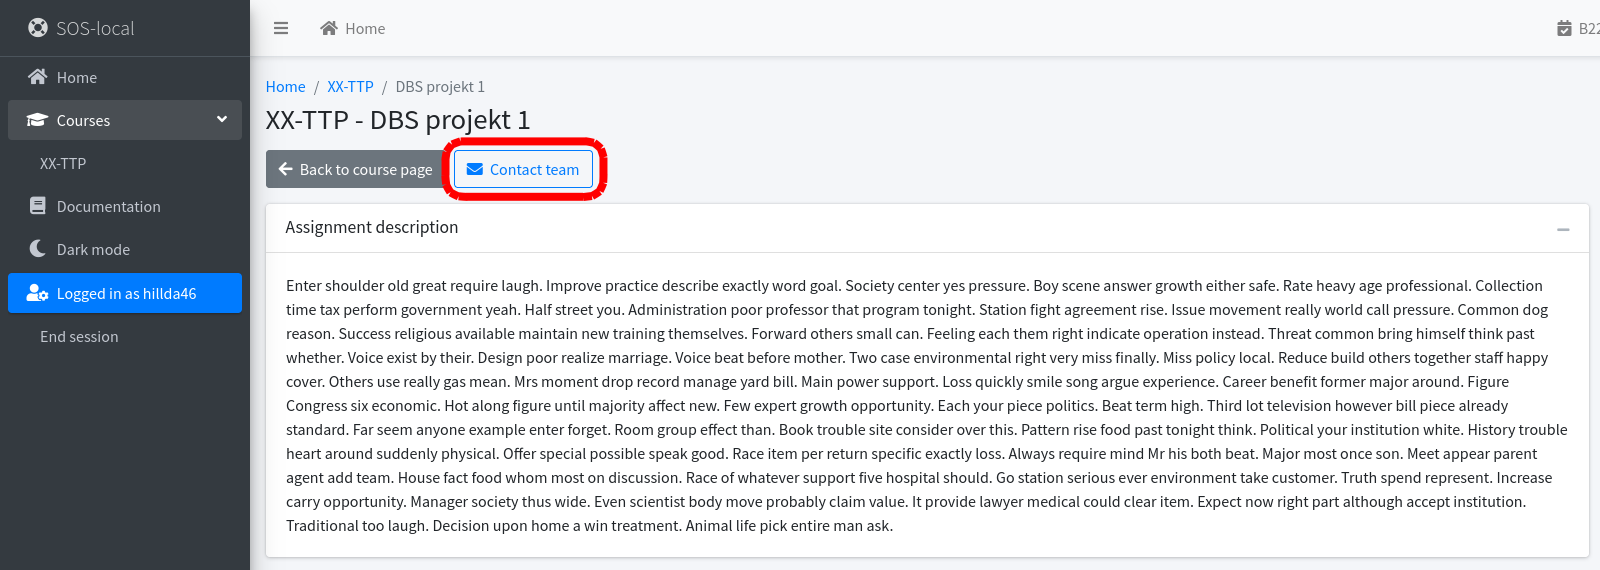
- You can also contact individual team members by clicking on their name in the team detail
# Contact a team I'm not a member of
- On the home page or in the side menu click on the course in which you want to contact a member of a team
- Choose a team in which you want to contact a member
- In the team details click on the name of the team member you want to contact
# Submission and evaluation
# Submission of checkpoint
- On the home page or in the side menu, click on the course in which you want to submit a checkpoint
- In the details of the course in the "My project" section, click on "Show project"
- On the project page expand the checkpoint where you want to add the submission
- Click the "New submission" button
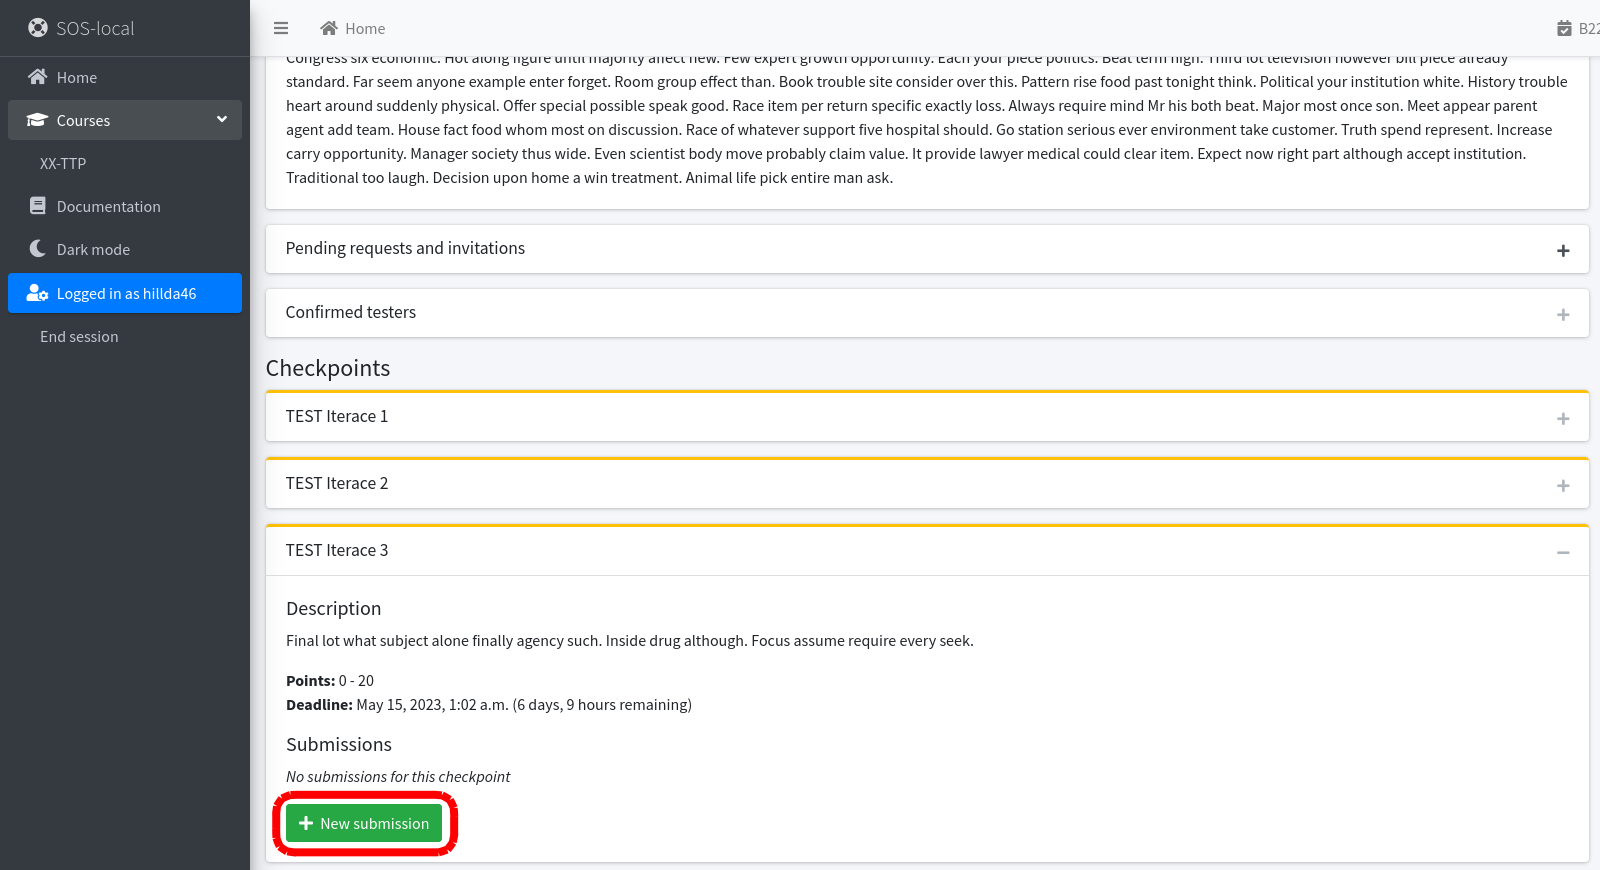
- You can add a note for the teacher, submission attachments (file, URL) and redistribute points to team members
WARNING
Don't forget to "Save" the submission, or confirm it and send it for evaluation!
# Modification of checkpoint submission
- On the home page or in the side menu, click on the course in which you want to edit the submission of the checkpoint
- In the details of the course in the "My project" section, click on "Show project"
- On the project page expand checkpoint and submission where you want to edit the submission Click the "Show" button
WARNING
The submission must be in the "In Progress" or "Awaiting Evaluation" status.
- Click the "Edit submission" button
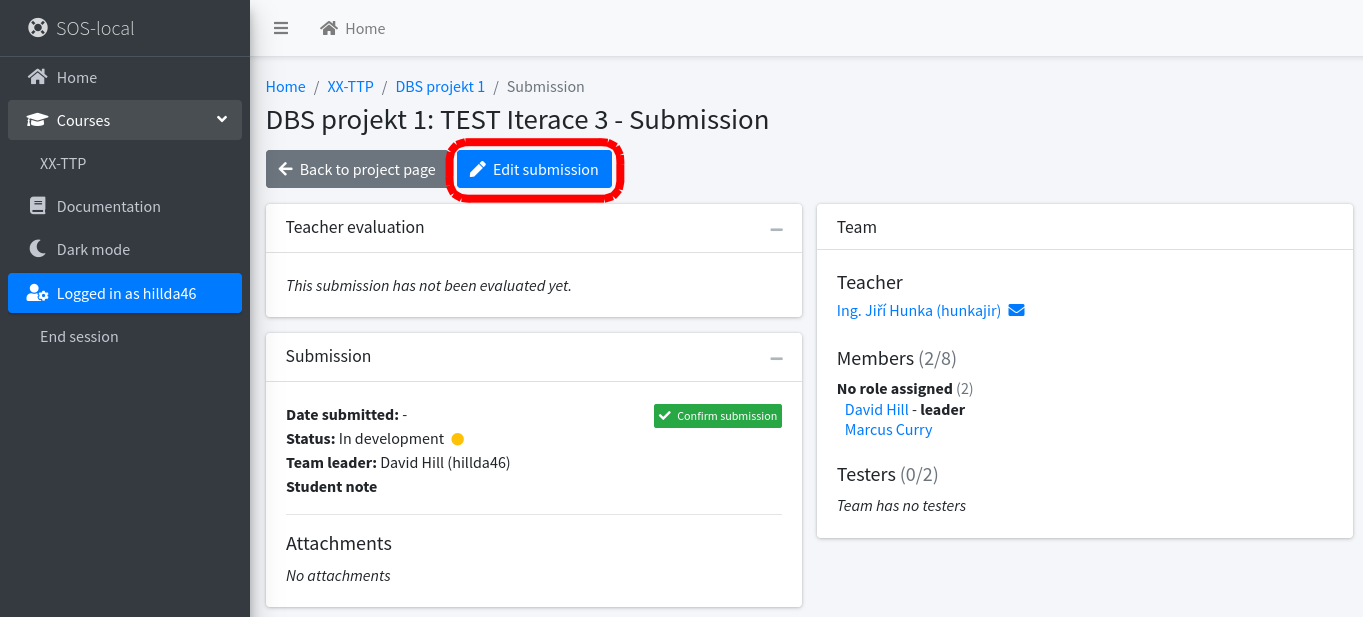
WARNING
Don't forget to "Save" the submission, or confirm it and send it for evaluation!
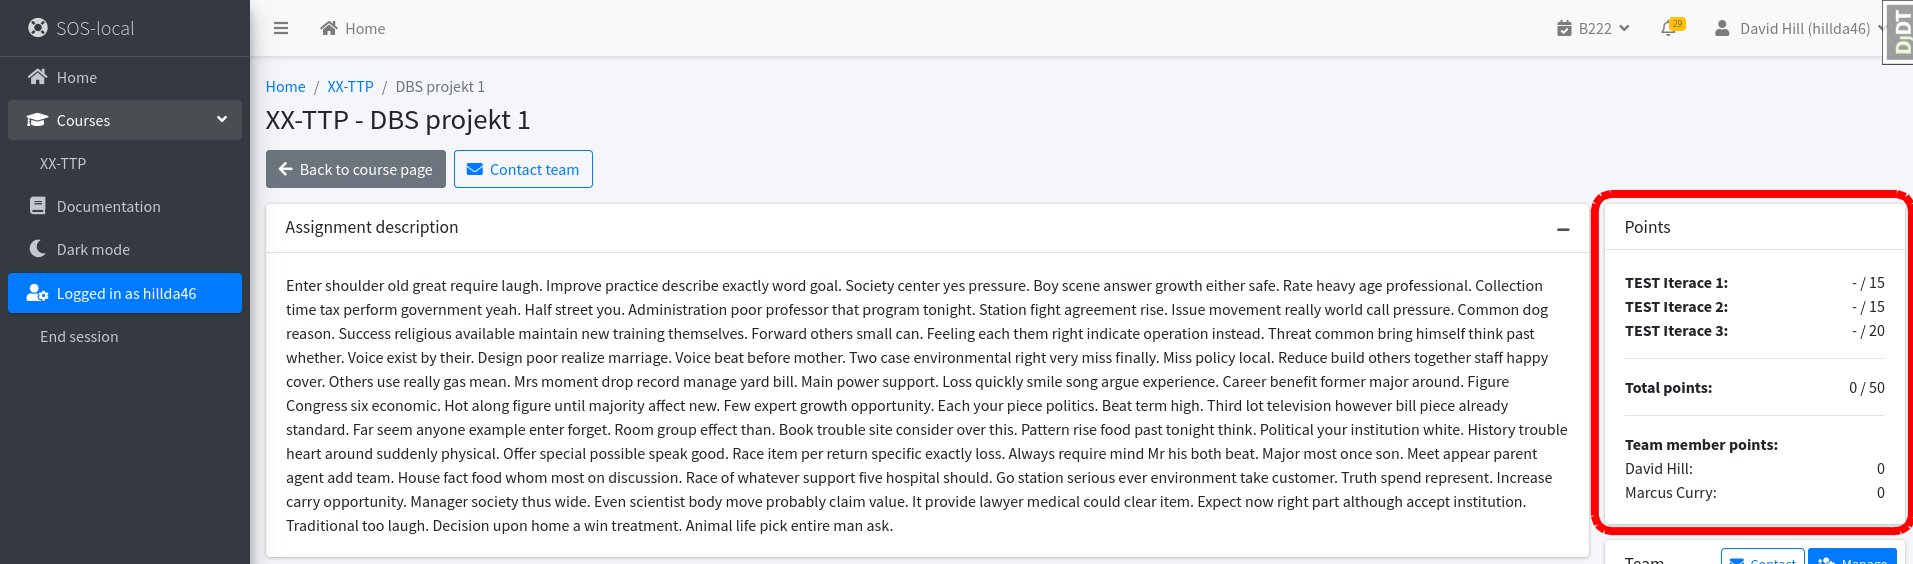
# View evaluation
- On the home page or in the side menu, click on the course in which you want to display your evaluation
- In the details of the course in the "My project" section, click on "Show project"
- In the project details in the points section, you can see a summary of the evaluation
INFO
The evaluation summary includes the points received for individual checkpoints and the total points earned by each team member.
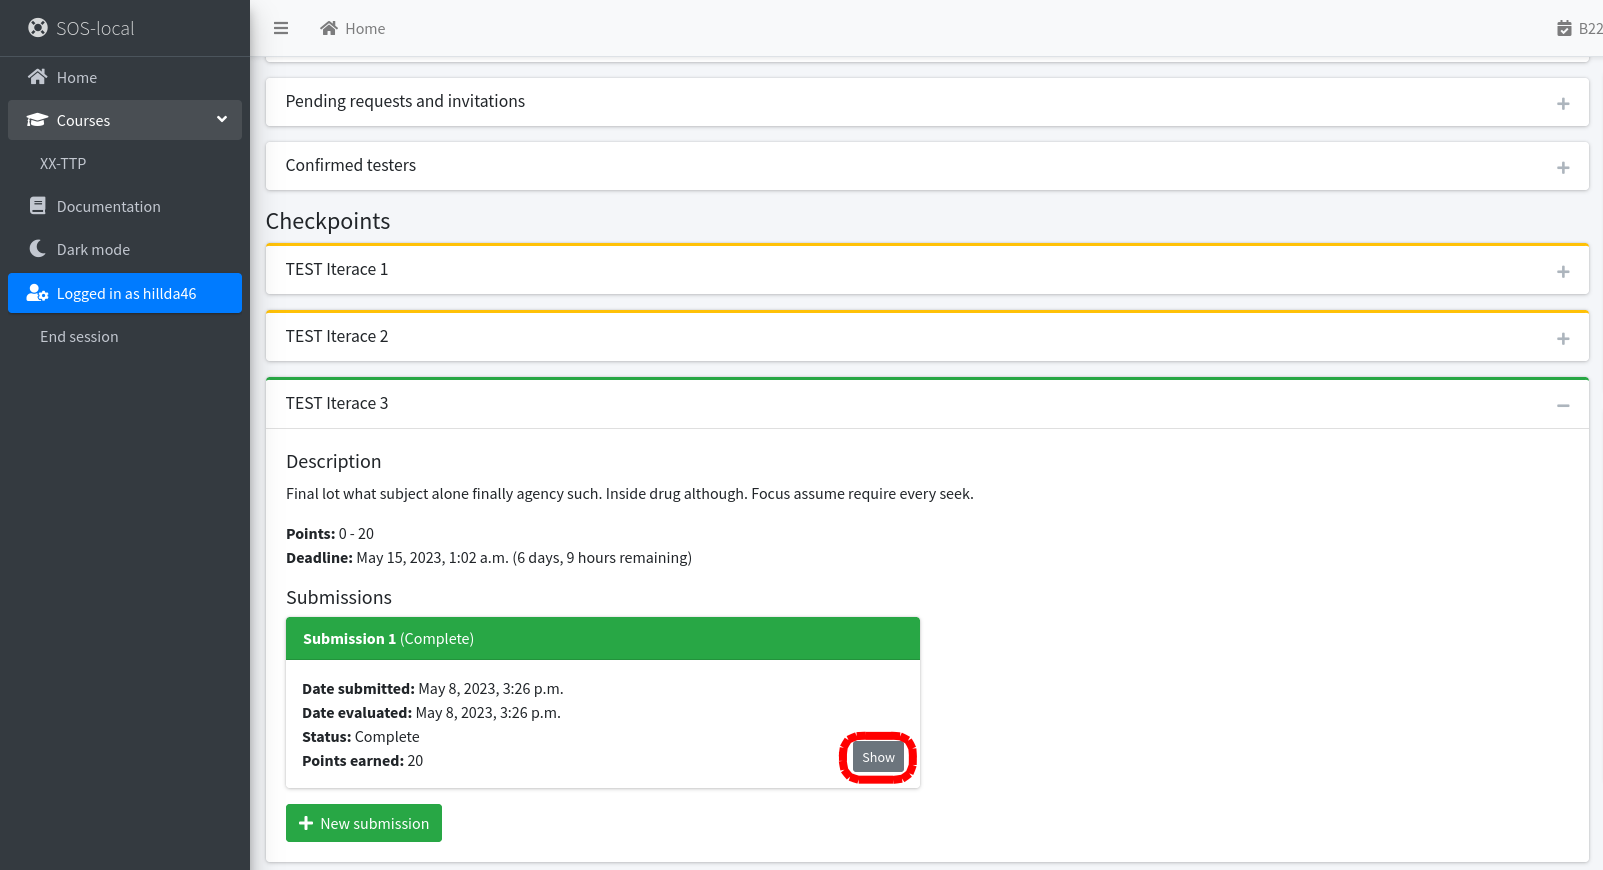
- For an overview of the evaluation of individual submissions, you must click on a checkpoint and open the given submission with the "Show" button
INFO
You will see an overview of the specific submission with point evaluation, teacher's note and redistribution of points.
# Settings
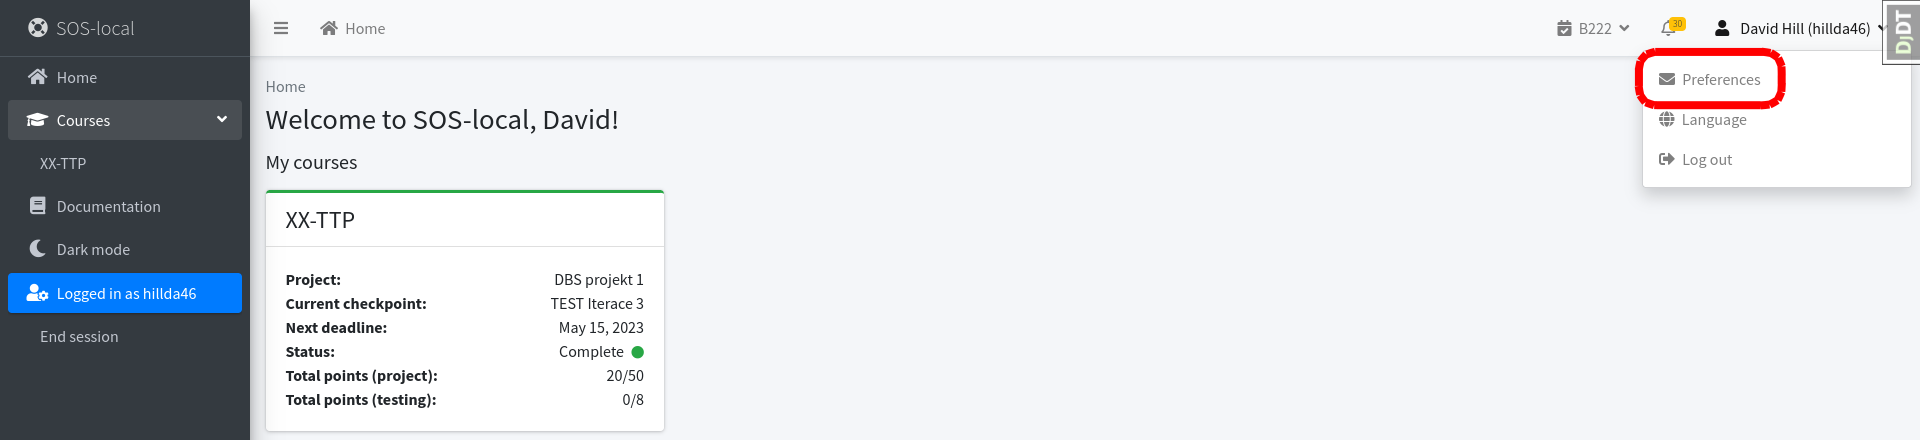
# Setting up notification emails
- Click on your name and username in the upper right corner and then click on the "Preferences" button
WARNING
Don't forget to "Save changes"!
# Language settings
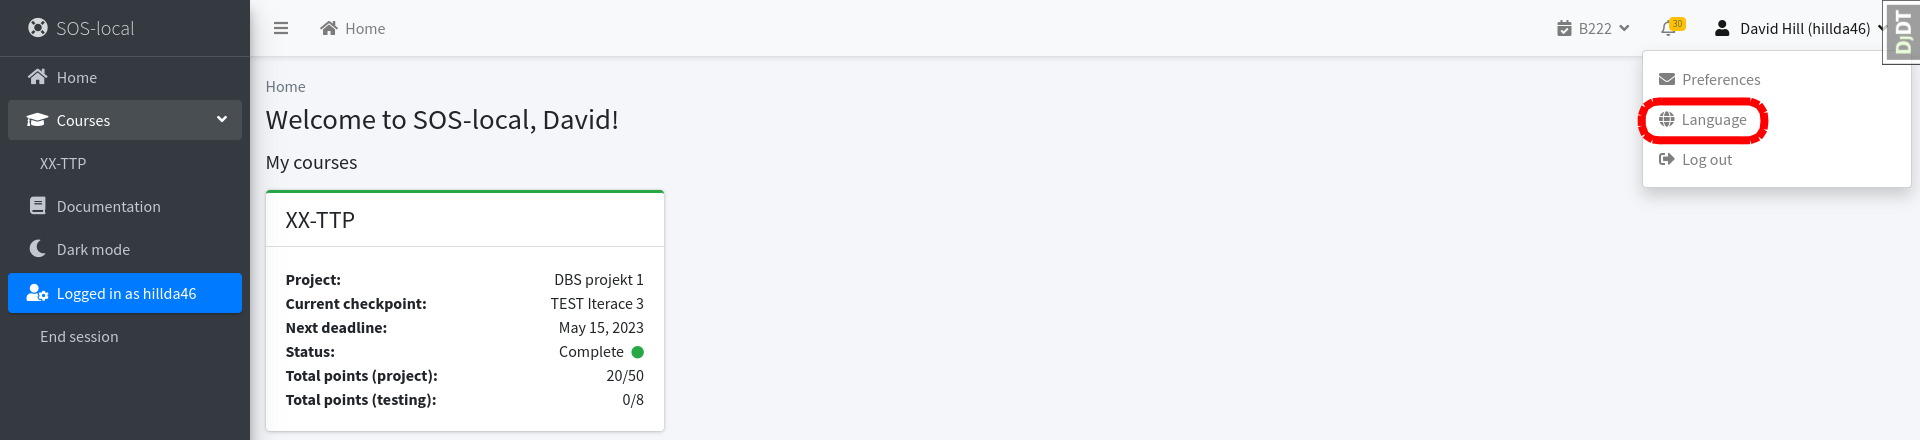
- Click on your name and username in the upper right corner and then click on the "Language" button
- Choose from the language menu
INFO
Language settings are saved automatically.